Common mushroom contamination: what it is, spot it, fix it
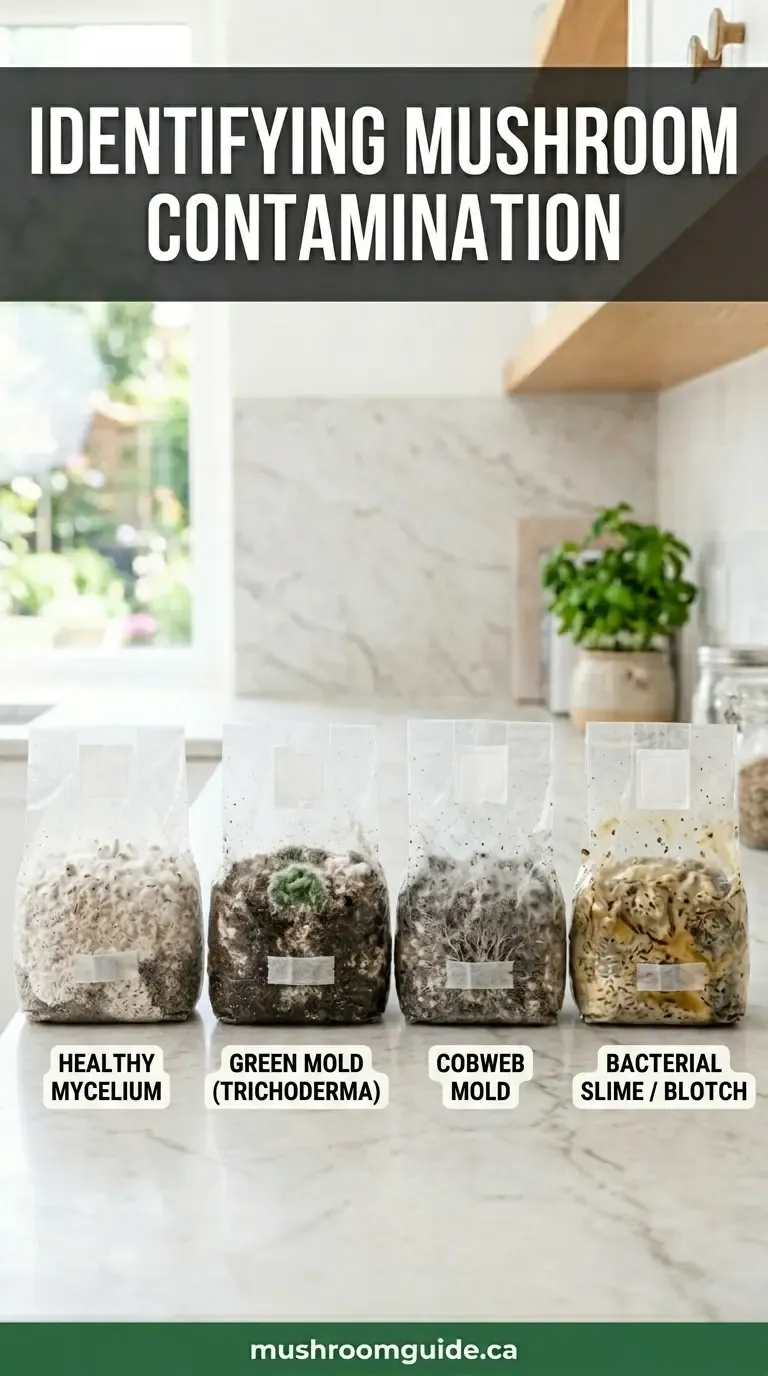
Most mushroom-cultivation failures are contamination, not technique. And most contamination is one of about six things. This post is the field reference: what each one looks like, why it happened, and what to do right now when you spot it.
Bookmark this. Open it the moment something on your block doesn’t look right.
TL;DR — what you’re probably looking at
| You see… | Most likely cause | Action |
|---|---|---|
| Bright/dark green patches | Trichoderma (green mold) | Small: cut out + isolate; large: toss |
| Pale grey fuzz, fast-spreading | Cobweb mold | Mist with 3% H₂O₂; lower humidity, more FAE |
| Black dots clustered in pinning area | Black pin mold (Aspergillus / Penicillium) | Toss the affected zone or block |
| Yellow/orange wet patches with sour smell | Bacterial wet rot (Pseudomonas) | Toss the affected zone; reduce surface moisture |
| Pink/orange slimy patches | Bacterial / yeast contamination | Toss the block |
| Black on the substrate surface, no smell | Often just normal mycelium discoloration | Wait, no action |
| Spider-web-like fluffy mycelium with NO defined edge | Cobweb mold (commonly mistaken for healthy growth) | Spot-treat with H₂O₂ |
Read the species-specific section below before tossing anything.
The contamination zoo
1. Trichoderma (green mold) — the most common killer
What it looks like:
- Starts as a small white patch (mistakable for healthy mycelium)
- Within 24–48 hours, the centre turns bright forest green or dark blue-green
- Spreads aggressively across the substrate surface
- Often appears at the spawn/substrate interface
Why it happened:
- Substrate wasn’t fully sterilized or hot enough during pasteurization
- Spawn was contaminated before you opened it
- Sterile work wasn’t sterile enough (room dust, breathing on the substrate, dirty tools)
- High-protein substrate (supplemented hardwood, grain) without pressure sterilization
What to do:
- Small spot, < 10% of surface, just starting: with a sterilized knife, cut out the green patch plus 2–3 cm of surrounding substrate. Discard. Wipe the surface with 70% isopropyl alcohol. Move the block to a different room to isolate. Watch closely.
- Larger or older: spores are already releasing into your fruiting chamber. Bag the block, take it outside, dispose in outdoor garbage. Wipe down the fruiting chamber with diluted bleach (1:10). Start over.
Prevention next time:
- Pressure sterilize supplemented substrates at 15 PSI for 2.5 hours, not 1.5
- Increase spawn ratio to 10% (more mycelium = faster colonization = less window for Trichoderma)
- Work in a still-air box, not in open air
- Wear an N95 (protects the substrate from your breath; also protects your lungs)
2. Cobweb mold (Hypomyces / Cladobotryum / Dactylium)
What it looks like:
- Pale grey or off-white, very fluffy and wispy
- Looks like spiderweb or thin cotton candy
- Spreads fast — often visible difference within 12 hours
- No clear leading edge (unlike healthy mycelium which has defined rhizomorphs)
- Often appears in fruiting chambers with high humidity and low FAE
Why it happened:
- Humidity too high (95%+ for too long)
- Fresh-air-exchange too low — stagnant air
- A small spore source somewhere in the chamber
What to do:
- Mist directly with 3% hydrogen peroxide (the brown-bottle drugstore kind, diluted 1:4 with water if you want to be gentler). The fluff will visibly retreat within 24 hours.
- Lower the chamber humidity to 85% and let it dry slightly between mistings
- Increase FAE — more frequent fan-on cycles, or crack the lid every few hours
Why this one’s salvageable: cobweb is a competitive mold, not a substrate-eater. Treated promptly, the mushroom mycelium continues colonization and fruits normally.
3. Black pin mold (Aspergillus, Penicillium, Mucor, Rhizopus)
What it looks like:
- Tiny black or dark grey dots
- Often clustered in pinning sites (the spots where mushrooms would form)
- Sometimes with a faint musty smell
Why it happened:
- High humidity + stagnant air on the substrate surface
- Old, oversaturated substrate
- Contamination during cutting of fruiting slits in the bag
What to do:
- Tiny, just appearing: with a sterilized blade, cut away the affected substrate surface to a depth of about 1 cm. Wipe with 70% isopropyl alcohol. Continue fruiting elsewhere on the block.
- Established: that fruiting site is done. Cut new fruiting slits on the other side of the bag (if the rest of the block looks healthy) or toss.
Note on safety: Aspergillus species in particular can be allergenic and produce mycotoxins. Don’t try to harvest mushrooms growing in close proximity to visible Aspergillus growth.
4. Bacterial wet rot (Pseudomonas tolaasii and related)
What it looks like:
- Yellow, orange, or brown wet patches on the substrate or on the base of mushroom clusters
- Slimy texture
- Distinctive sour, ammonia, or rotting-vegetable smell
- Often appears at the substrate/cluster interface
Why it happened:
- Too much standing water in the fruiting chamber
- Mushrooms were misted directly (you should mist around mushrooms, not on them)
- Substrate was over-hydrated initially
- Fruiting chamber wasn’t cleaned between cycles
What to do:
- On the substrate (not on mushrooms): cut out the wet/slimy area. Reduce misting. Lower chamber humidity to 85%.
- On harvested mushrooms: compost. Bacterial spoilage in oyster mushrooms has caused documented food poisoning. Don’t eat anything with this smell.
5. Pink / orange slimy patches (often Neurospora or pink yeasts)
What it looks like:
- Bright pink, salmon, or peach-coloured patches
- Wet, slimy texture
- Often appears on grain spawn or freshly inoculated substrate
Why it happened:
- Spawn was contaminated before you used it
- Pressure cooker wasn’t reaching temperature properly
- Substrate cooled too slowly after sterilization (window for airborne spores)
What to do:
- Toss. Pink molds are aggressive and rapidly take over. They’re also extremely difficult to remove from your work space — Neurospora in particular is the bane of commercial mushroom labs.
- Clean affected work area with diluted bleach (1:10). Don’t reuse the bag.
6. Black surface stain that’s actually OK
What it looks like:
- Diffuse darkening of the substrate surface
- No raised structure, no fuzz
- No smell, or a faintly earthy mushroomy smell
- The white mycelium continues colonizing through it
What it is: often just oxidation or normal pigment from the mycelium itself, especially with shiitake (the famous “browning” phase) or lion’s mane.
What to do: nothing. Wait. If it stays uniform and there’s no smell, it’s fine.
What healthy looks like (so you know the baseline)
| Stage | Healthy signs |
|---|---|
| Fresh inoculation | Visible spawn grains in clean substrate, no off colour, mild grainy smell |
| Days 1–7 | Small white patches spreading from each spawn point |
| Days 7–14 | Most of substrate white, mycelium has distinct rhizomorph (thread-like) edges |
| Fully colonized | Uniform white surface, possibly with some yellow “mushroom sweat” exudate (normal) |
| Shiitake browning (weeks 6–12) | Tan to chocolate-brown surface, raised bumpy texture, mild sweet/nutty smell |
| Pinning | Tiny mushroom-shaped primordia in cuts or on surface |
If what you see matches the healthy signs, leave it alone. Most beginner-grower “is this contamination?” panics are healthy growth.
When in doubt — the sniff test
Healthy mycelium smells faintly of:
- Fresh mushrooms
- Damp forest floor
- Almonds (for some strains)
- Bread dough (in early colonization)
Contamination smells:
- Sour or ammonia → bacterial wet rot
- Strongly chemical or “wet basement” → mold
- Sweet rotting fruit → yeast contamination
- Burnt rubber → some fast-growing bacterial cultures
The smell test is more reliable than the visual test. When you open the bag and your face wrinkles, trust your nose.
The contamination calculus
You don’t have to save every block. Sometimes the right answer is:
- Bag it
- Take it to outdoor garbage
- Disinfect your work area
- Order fresh spawn and try again
Time spent fighting a heavily contaminated block is time you could be running a clean batch. A 5 lb block costs $20–40 in materials; your time is worth more.
Prevention rules
The rules that prevent 90% of contamination, in priority order:
- Pressure sterilize supplemented substrate. Pasteurization is for straw, not for grain or supplemented sawdust.
- Work in still air (still-air box or flow hood). Open air = airborne spores.
- Use 10% spawn ratio, not 5%. More spawn = faster colonization.
- Don’t talk over open substrate. Wear an N95.
- 70% isopropyl alcohol on your hands, tools, and bag exteriors before opening anything.
- Clean the fruiting chamber between cycles with diluted bleach (1:10), rinsed thoroughly.
- Use fresh spawn. Old spawn (> 8 weeks since shipment) loses vigour.
- Maintain 85–90% humidity in fruiting, not 95%+. Wet surfaces invite contamination.
Most contamination is at the inoculation step. If you nail the sterile work, you’ve handled most of the risk.
Spore safety reminder
When opening a bag with visible mold contamination, always wear an N95, ventilate the room, and take the bag outside before opening for disposal. Some moulds (particularly Aspergillus and Penicillium) produce spores that are themselves health hazards, and the goal is to remove them from your living space without dispersing them through your lungs.
Related: How to grow oyster mushrooms in Canada, How to grow lion’s mane mushrooms in Canada, How to grow shiitake mushrooms in Canada, How to grow chestnut mushrooms in Canada — the cultivation guides this troubleshooting post supports. DIY fruiting chamber build — bad FAE / humidity = cobweb and pin mold; this build fixes both. Best pressure cooker for mushroom growing in Canada — most contamination starts with under-sterilized substrate. Mushroom worker’s lung + N95 guide — mask discipline when cleaning out a contaminated cycle.